Homemade Pink Pickles: Tangy Turnips in Just 5 Days
There's a vibrant condiment that consistently brightens Middle Eastern tables, not just with its stunning color but with a flavor profile that's utterly irresistible: pink pickled turnips. If you've ever savored an authentic shawarma or a crispy falafel, chances are these ruby-hued delights were nestled alongside, offering a burst of tangy crunch. The good news? Crafting these culinary gems at home is far simpler than you might imagine. In fact, with just a handful of ingredients and a mere five days of patience, you can have your own batch of
simple pink pickled turnips ready to transform any meal. This guide will walk you through the easy process, ensuring you achieve that perfect balance of zing and crispness, along with their characteristic hot pink glow.
The Allure of Pink Pickled Turnips: A Middle Eastern Staple
Pink pickled turnips, known as
lift makhlal in Arabic, are more than just a garnish; they are an integral part of the Middle Eastern culinary experience. Their presence on the plate is almost as essential as hummus or pita bread, providing a critical counterpoint to rich, savory dishes. Imagine the robust flavors of grilled meats, the earthiness of falafel, or the creamy indulgence of a mezze platter – all brought into perfect harmony by the sharp, refreshing bite of these pickles.
What makes them so appealing? It’s a masterful blend of sensory delights. First, there's the aesthetic impact: an impressively hot pink color that instantly elevates any dish. Then comes the texture – wonderfully crisp and crunchy, offering a delightful resistance with every bite. Finally, the flavor profile is complex yet harmonious: a tangy sweetness, balanced with an underlying earthiness, and a subtle savory depth. This isn't just an introduction to pickling; it's an invitation to explore the versatile world of a cherished condiment that goes beyond its Middle Eastern origins, pairing beautifully with everything from Moroccan tagines to simple grilled chicken. They are truly an easy way to add distinctive flavor to your plate.
Unveiling the Magic: How to Make Simple Pink Pickled Turnips
The beauty of these pickles lies in their minimalist approach. With just a few basic components and a straightforward method, you'll be amazed at the professional-quality results you can achieve. This recipe is a wonderfully simple introduction to making your own pickles, perfect for a small batch or if you're new to home fermentation.
Gathering Your 5 (Plus Water!) Essential Ingredients
The core of any great recipe lies in its ingredients, and for
simple pink pickled turnips, quality and quantity are key. You’ll need:
*
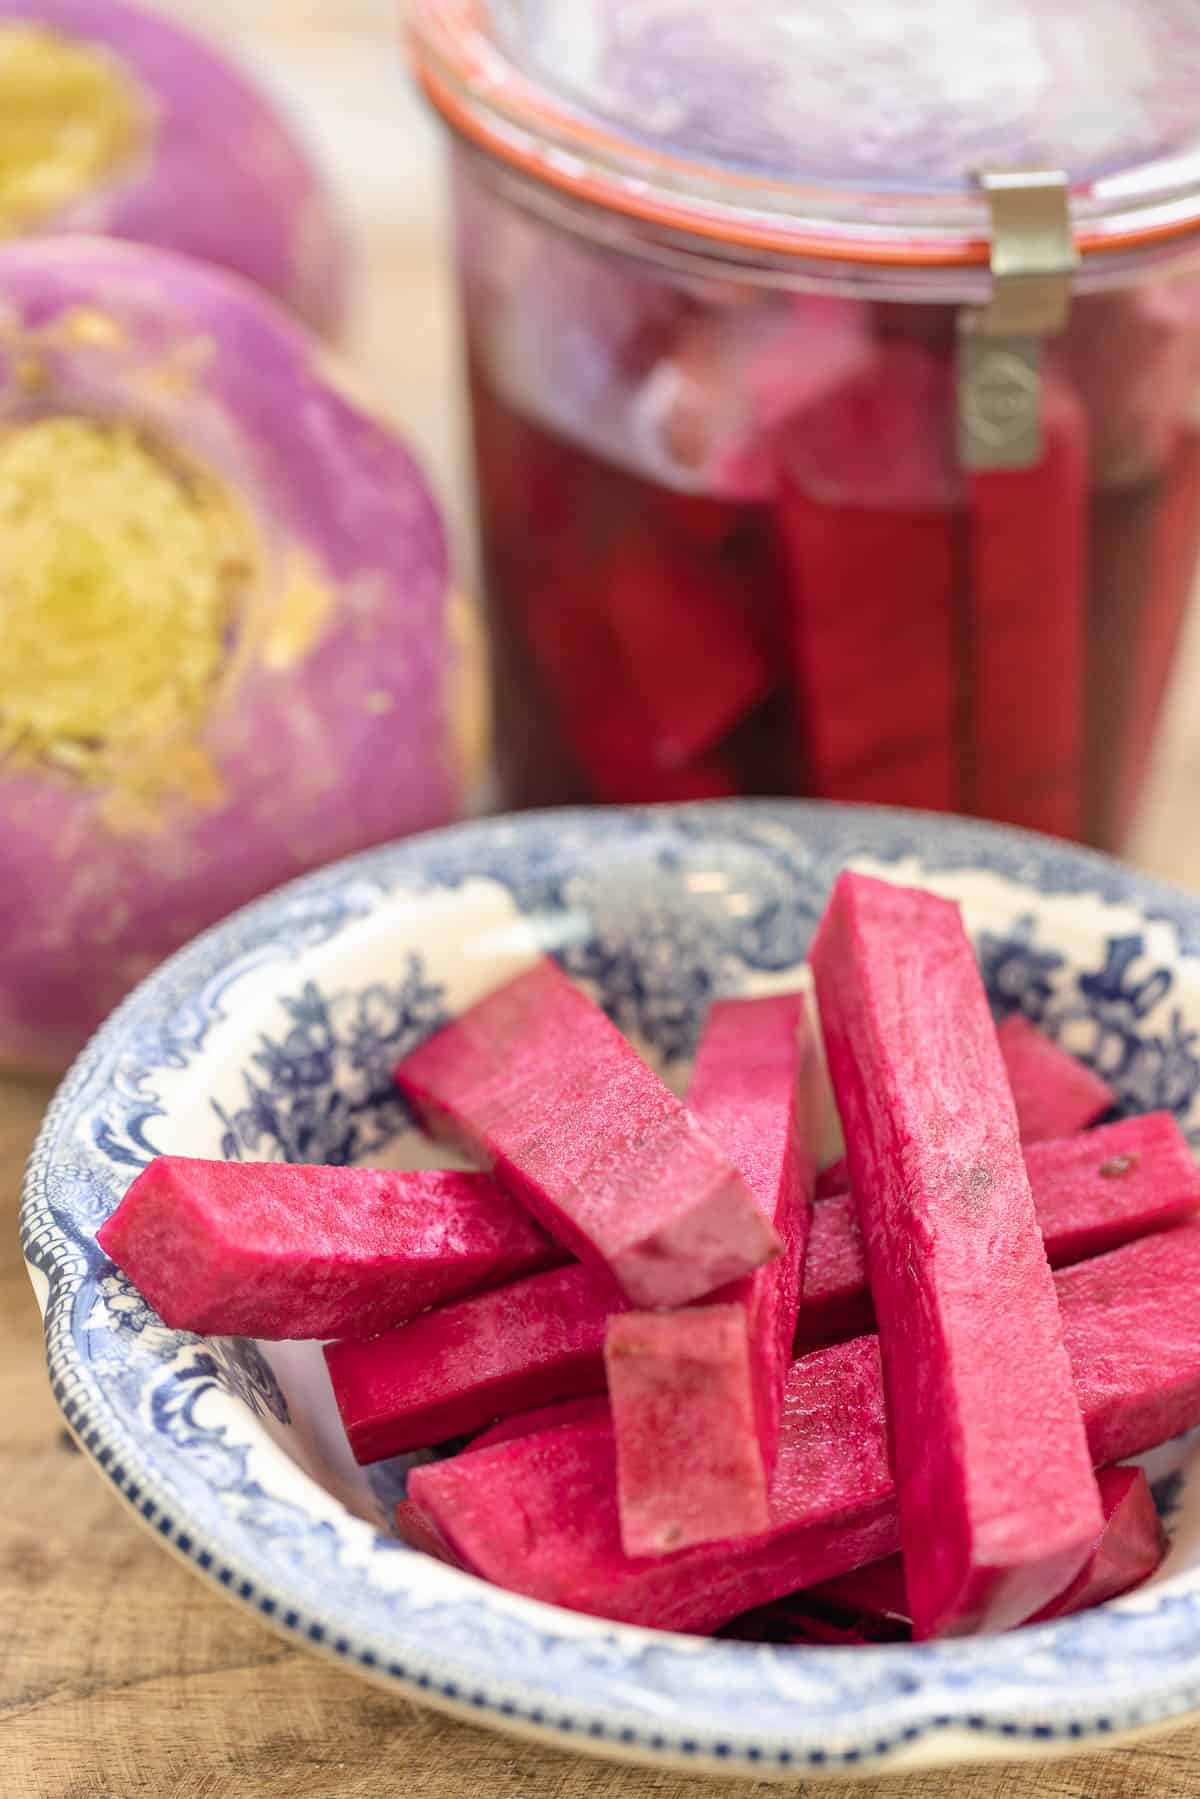
Fresh Turnips: Look for firm, blemish-free turnips. White turnips are typical, but any variety will work as the beet will do the heavy lifting for color.
*
Beets: These are the natural magicians behind the vibrant pink hue. Crucially, they impart no flavor to the pickles, serving purely a visual purpose. You can slice them thinly like the turnips or chop them into rounds for easy identification later.
*
Water: Filtered water is often preferred for pickling to avoid any chlorine taste that might affect the final product.
*
Salt: Non-iodized salt is paramount for pickling. Iodine can sometimes interfere with the fermentation process and turn vegetables dark. Kosher salt or pickling salt are excellent choices. The salt content is vital for preservation and flavor development.
*
White Vinegar: Vinegar provides the essential acidity for pickling, contributing to both the tangy flavor and the preservation of the turnips. Distilled white vinegar is most commonly used for its clean, sharp taste.
That's it! Just these five simple ingredients (plus water) are all you need to create these stunning homemade pickles.
Step-by-Step Pickling Process
Making these pickles is less about intricate cooking and more about careful assembly and patience.
1.
Sterilize Your Jars: This is a non-negotiable first step to ensure your pickles stay safe and last longer. Wash your jars and lids thoroughly with hot, soapy water, then sterilize them by boiling them for 10 minutes, running them through a dishwasher's sterilize cycle, or heating them in an oven. Allow them to air dry completely. Any lingering bacteria could compromise your pickle batch.
2.
Prepare the Brine: In a large bowl or pitcher, combine your water and salt. Stir well until the salt is completely dissolved. A traditional and reliable method to ensure the brine is salty enough for optimal pickling is the "egg test." Gently place a raw egg (in its shell) into the brine. If the egg floats, you've added enough salt. If it sinks, add more salt, stirring until it dissolves, and re-test with the egg until it floats. This indicates a sufficient salt concentration for both preservation and flavor. Once the salt is right, stir in the white vinegar.
3.
Prepare the Vegetables: Wash and peel both your turnips and beets. Slice the turnips into your preferred shape and thickness – sticks, rounds, or wedges all work beautifully. Many prefer thin strips, similar to French fries, for easy eating. For the beets, you can slice them thinly to mimic the turnips, or cut them into thicker rounds or chunks if you want to easily pick them out later (remember, they’re just for color!).
4.
Fill the Jars: Neatly pack your sterilized jars with the sliced turnips and beets. Try to distribute the beets evenly so their color can infuse throughout. Don't pack them too tightly, as the brine needs to circulate.
5.
Pour the Brine: Carefully pour the prepared brine over the vegetables in each jar, ensuring that all pieces of turnips and beets are fully submerged. This is critical for proper pickling and to prevent spoilage. Leave about half an inch of headspace at the top of the jar.
6.
Seal and Set Aside: Securely close the jars with their lids. Give the jars a gentle shake to distribute the brine and ensure any air bubbles escape. Place the jars in a dark cupboard at room temperature, away from direct sunlight.
7.
The Waiting Game (5 Days Minimum): This is where patience truly pays off. Your
simple pink pickled turnips need at least 5 days for the flavors and, most importantly, the color to fully develop. You'll notice the brine gradually turning pink, and the turnips transforming from white to a gorgeous, vibrant hot pink. While traditional methods suggest pickling at room temperature on the counter, if you're at all concerned, you can also let them pickle in the refrigerator for the entire duration, though the process might be slightly slower.
8.
Refrigerate and Enjoy: Once your pickles have achieved their desired color and tang (usually around day 5 to 7), transfer them to the refrigerator. They will continue to develop flavor over the first few days in the fridge and will keep wonderfully for several weeks, or even up to a month.
Beyond the Basics: Tips for Perfect Pink Pickles Every Time
While the process is straightforward, a few additional insights can elevate your pink pickled turnips from good to absolutely fantastic.
*
Choosing the Right Turnips: Always opt for fresh, firm turnips. Avoid any that are soft, bruised, or discolored, as these can affect both the texture and the shelf life of your pickles. Smaller turnips tend to be sweeter and less fibrous than larger ones.
*
Beet Wisdom for Optimal Color: The magic of the beet is that it's purely for aesthetics. If you find your pickles aren't as vibrantly pink as you'd like after a few days, simply add a few more thinly sliced beet pieces to the jar. The color will intensify over time. Conversely, if you want a slightly paler pink, use fewer beets. Remember, their flavor contribution is negligible. For more details on achieving that stunning hue, check out
Get Hot Pink Pickled Turnips for Authentic Middle Eastern Dishes.
*
The Egg Test Explained (Again): Don't skip the egg test for your brine. This ancient technique is crucial for ensuring the correct salinity for proper preservation and to create an environment where beneficial bacteria can thrive while harmful ones are inhibited. It’s a simple yet highly effective way to guarantee your pickling success.
*
Patience is Your Best Friend: Resist the urge to open your jars too early. While you might see some color change within 2-3 days, the full flavor profile and the deep, satisfying crunch won't be achieved until at least day 5, and often day 7 is even better. The longer they sit, the more complex their tangy sweetness becomes.
*
Customization and Flavor Boosters: While the basic recipe for
simple pink pickled turnips is fantastic on its own, don't hesitate to experiment!
*
Garlic: A few peeled garlic cloves added to the jar can infuse a subtle savory note.
*
Bay Leaves: One or two bay leaves can add a delicate, herbal aroma.
*
Chili Flakes: For a hint of heat, a pinch of red chili flakes can be a wonderful addition.
*
Peppercorns: A few black peppercorns will add a mild, earthy spice.
These additions don't detract from the authentic flavor but can personalize your batch.
Serving Suggestions: Elevating Your Meals with Pink Pickles
Once your homemade pink pickles are ready, the possibilities for using them are endless. Their tangy, crisp nature makes them an incredibly versatile condiment.
*
The Classic Pairings: This is where they truly shine. Serve them alongside:
* Shawarma (chicken, beef, or lamb)
* Crispy falafel sandwiches or platters
* Gyros and kebabs
* Mezze platters with hummus, baba ghanoush, and olives
* Grilled chicken or red meat kabobs
They provide a refreshing contrast that cuts through the richness of these dishes, making every bite more enjoyable.
*
Beyond Middle Eastern Cuisine: Don't limit these beauties!
*
Sandwiches and Wraps: Add them to any sandwich or wrap for a burst of flavor and crunch. They're fantastic on burgers or pulled pork sandwiches.
*
Salads: Chop them up and toss them into green salads, grain bowls, or even chicken or tuna salads for an unexpected zing.
*
Snack Time: If you're a pickle enthusiast, these make a wonderful, low-calorie snack straight from the jar.
*
Rice and Yogurt: In some Middle Eastern households, they're even enjoyed alongside simple rice dishes or with a dollop of creamy yogurt.
Their versatility is part of their charm, and once you start making them, you'll find countless ways to incorporate these vibrant pickles into your daily meals. For more easy Middle Eastern flavors, consider this
Ingredient Pink Pickled Turnips: Easy Middle Eastern Flavor recipe.
Making your own
simple pink pickled turnips is a rewarding culinary adventure that brings a touch of Middle Eastern vibrancy right into your kitchen. With minimal effort, basic ingredients, and a bit of patience, you'll soon be enjoying these tangy, crunchy, and absolutely stunning homemade pink pickles. They're a testament to how simple ingredients can create profound flavors, transforming everyday meals into something truly special. So, gather your turnips and beets, prepare your brine, and get ready to impress your taste buds in just 5 days!